As my hair is ombre I decided to buy the light ash blonde hair extensions from Foxy Locks and dye the top half of them a dark blonde in order for it to match my hair. It is a lot easier going darker than going lighter.

So far I have dyed the top half of the hair extensions once, however because of how light they were to begin with they are still quite light compared to my darker blonde hair on my head. I don't think I will be able to get the hair extensions to match 100% but if I can get it quite close I will be satisfied as long as it blends well.

The dye that used the first time and will be using again is the Nice n Easy Dark Cool Blonde/Natural Dark Blonde as these are the colours I normally dye my hair to create the ombre look when I went ombre the first time and second. I normally use either one of these because they are very close to each other and they turn out basically exactly the same.

First attempt:

(I forgot to take a photo of my first attempt!)

I had already worked out which extensions went where before hand so I knew what extensions needed to have more dye on than the others. Before I started each layer of extensions I put it up to my head where it would be clipped in and measured where I needed to put the dye. I used Nice n Easy Cool Dark Blonde. I started off by dying the higher up extensions as they would need to be the darkest, I then worked my way through the higher up extensions until about a couple of inches from the top of the extensions had been covered in the hair dye. I left this on for a bit and then added more starting from where the hair dye ended. I kept on checking this with my hair as I wanted it to have the gradient effect that my hair had, so it would match my extensions a lot better. I did this for all of the extensions until I was satisfied that all of the hair that needed to be covered was.

I then left this on for about 30-40 minutes and washed it off after. I also used some purple shampoo to tone the light ash blonde as my hair was a tiny bit lighter/whiter than the hair extensions. I left the hair extensions to dry naturally.

The next day I clipped them all in to see if they looked ok, there was still a colour difference. The hair extension bits that were dyed did look a lot more ashy/grey than my hair turns out to be, but this is just because of how light the hair extensions were in the first place. This is the same as to what happened with my own hair. When I first went ombre over a year ago my hair was all over a very light blonde like my extensions. I put on a dark blonde and it went a ashy/grey colour, I then put on another hair dye to make it darker which worked. It is just because the hair is so light to begin with that it will obviously come out as a much lighter colour than the colour on the box. So therefore it needs to be dyed twice in order to get the darker colour that I wanted.

Second attempt: 

Today (22nd Jan) I decided to dye my extensions again. I put my extensions on a plastic bag on top of a towel and mixed up half of the dye. I thought I brought the Cool Dark Blonde but it was Natural Dark Blonde Nice n Easy. I normally go between the two as they are quite similar and they turn out basically the same colour. At the moment the hair dye is on my extensions as I am typing this. I did exactly the same as before, however I didn't go as far down with the dye as they were a similar colour to my hair it was just the tops of the extensions that needed doing.


The two end pieces on the right hand side is the colour that my hair extensions were with the first lot of dye on, the other ones have the second lot of dye on with the dye developing. 


Other parts of the extensions with the dye on, these are the higher up extensions which have more dye on them. 


I always use a mixing bowl when doing my hair now, I never mix it in the bottle as I find it easier applying the dye with a tinting brush than from the bottle itself. This also means that I can mix up as much or as little of the mixture as I want to. It is a lot easier to do this with hair extensions as well! I brought the tinting bowl and brush from Boots a while ago it wasn't that much at all probably about £4ish?! 

I plan to leave the hair dye on for about 30-40 minutes, the dye is defiantly coming through a lot darker than before but it will lighten when I wash it off. I shall wash it out with my normal shampoo Aussie moisture shampoo I think it is called that I using at the moment. I shall use the conditioner that comes with the hair dye and I will leave it on for about 30 minutes to deep condition them. I shall then let them air dry and hopefully test them out tomorrow! 

If I do find that they do need dying again I still have half of the mixture left that I did't mix together. I can easily go over the bits that need redoing, but I am hoping that they won't need redoing! Fingers crossed. 

The result:


My fringe needs a trim! 

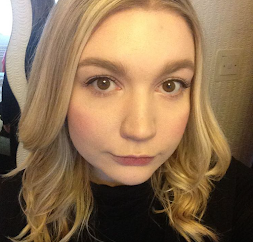
(23rd Jan) I am wearing the extensions in the photo above, it gives me about 6 inches plus extra length which is why I wanted them. I waved them slightly so it would blend in better with my hair and pinned up two sections of hair from the side to the back. I do this when wearing extensions so if it is windy my hair is securely pinned down so the extensions shouldn't show. As you can tell you can hardly see where the extensions are compared to my own hair. The extensions turned a lot less grey/ashy more to the colour of my dark blonde. 

Overall I am very pleased with how they turned out. I even got a compliment from my mom who has never liked me wearing extensions saying that my hair looks nice, which I was totally shocked about. I laughed after because she didn't even realise I was wearing extensions, I don't see how because my hair is loads longer but still! At least I know it looks natural and blends really well. 


Coat: Sheinside 
Wedge boots: Tesco 


Daisy cropped top: H&M
Dress: Primark 
Leggings: H&M
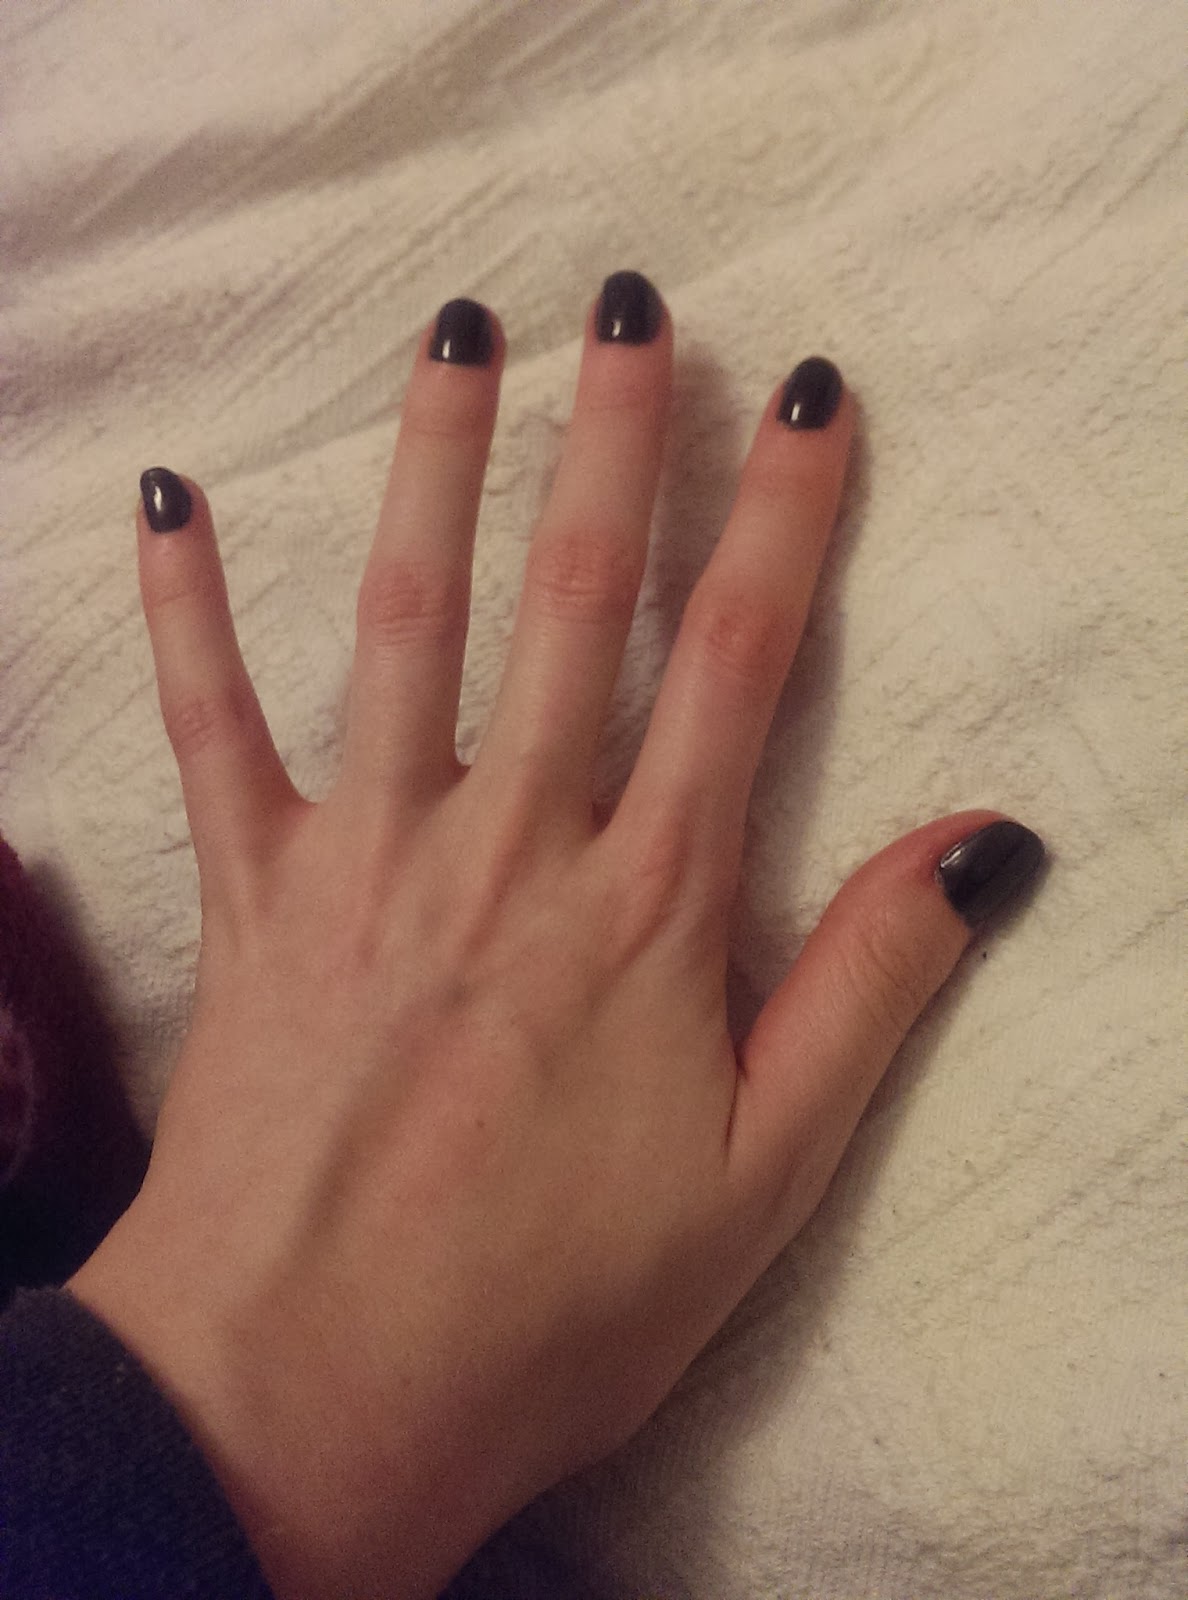
Nails: Sensationail red 

My first order from Shesinside, I recently brought this coat:


It is called a 'black hoodie belt waist open long coat' and it was £19.54 reduced to £15.55. I ordered it on the 8th Jan and it turned up today. I had to sign for it as well which is good as I don't really like finding parcels in the porch as anyone could just take it out and I wouldn't know. 

The coat came in a grey plastic package, when I opened it up it was in a zip bag that had sheinside written on it which I thought was a nice touch. The zip bag was quite thick plastic so you know that if the outer package got knocked about the items inside the zip bag should be fine. 

I had to order the medium as there wasn't any size small left. It does look like the image, however I did find that the hood seemed to be a bit small from what it looked like on the photos. Most hoods tend to be too small for my head (do I have a big head?!) but I thought that this hood would be alright because it does look quite big in the photos, sadly it isn't. The arms feel a tad tight but I did have a dress and quite a thick jumper on when wearing it. The arms are also slightly too short as well, I do like the arms to be quite long on coats, cardigans etc but it is something I can get away with as it isn't that noticeable. As for the material it is very thin, defiantly more of a summer coat! It doesn't feel waterproof either so you would defiantly need an umbrella if it rains. 

As I had to order the medium there is a lot of material around the bottom of the coat. This is the style of the coat anyway as it flares out to give you more shape. However because I had to order a bigger size there is more material at the bottom than I really need. It doesn't look too bad, as it is just does up by the belt you can easily overlap the material to make it look better. The coat is not long as it says so in the description/name it comes to just below the bum which to me is not a long coat at all. I knew it wasn't going to be long from the photos that other girls have posted wearing the coat. The good thing about the website is that if bloggers have brought and worn the items they can upload an image. Which is very helpful as you can see what it looks like on a person. 

Overall it is quite a nice coat, if I wanted to wear it now I would defiantly need to layer up and wear a chunky scarf because of how thin it is! The shape of the coat defiantly will add some curves to the figure because it flares out at the bottom almost like a skater dress type style. I do really like it and I am looking forward to wearing it when the weather warms up a bit! 

Wearing the coat: 


Link to page:

http://www.sheinside.com/Black-Hoodie-Belt-Waist-Open-Long-Coat-p-112122-cat-1735.html
I had an email this morning about 5am-ish from the Royal Mail telling me that the package with my Foxy Locks extensions in was at my local post office and will be sent out today. It didn't come with the normal post but came in a van about 1pm-ish.

When I opened up the pink parcel this is what I saw, my deluxe no60 ash blonde 20 inch hair extensions with the Foxy Locks case:


The hair extensions:


(I did take the hair out of the packet before I took the photos)

The case:


Hair extensions go in the middle, two pockets either side. 


Quote from website explaining what you get: 


Foxy Locks Deluxe sets are one of the thickest clip in hair extensions on the market!

The weight of these stunning hair extensions is 165 grams!

Whilst most other sellers only sell 70-100 grams of hair, making ours the thickest.

Transforms flat, lifeless hair into voluminous, long gorgeous locks! 100% Remy silky
smooth tangle free human hair.

20" 10 piece set (Full head):
One x 8" wide with 4 clips
One x 7" wide with 4 clips
Two x 6" wide with 3 clips
Two x 4" wide with 2 clips
Four x 1" wide with 1 clip

(You also get two spare clips with the set.)


All hair extensions clipped in.


Colour:

I found that the ash blonde was a bit more yellow than what it looks like on the website. It doesn't really look that bad when I put the extensions in but I will defiantly need to slightly lighten the ends of my own hair and probably tone the extensions slightly as well. I will also need to put a darker blonde onto the top half of the extensions as I do have ombre hair so the top half of my hair is a medium/dark blonde.  

Length:

It is true to the length 20inches long, I will need to trim the hair slightly as when I put all of the hair in it looked a bit weird at the ends because tiny bits were longer then the other. So I will be trimming it so it is all one length at the end. The only thing that I may need to do is use a weft or two of my old extensions that aren't as nice to add as layers between my own hair and the extensions. As there is about 8inches from my hair to the end of the extensions. I would like it to look a bit more natural which by adding a weft or two of shorter extensions will hopefully do. 

Thickness: 

The hair is so thick! I was worried because my hair is medium-thick but most of it is in the layers, I am slowly growing my hair out but trimming it as well so the shorter layers can catch up to the longer layers. I was still worried that it may look weird but it looks quite nice. The thickness of the hair does thin out towards the ends but it is nothing like some of the extensions I have brought before. The ends are also cut straight across which makes it look thicker as well. 

Weight: 

I thought that the weight of the hair may be a problem, that I would be able to feel it but I can't really feel it at all. The only thing I can feel was some of the clips, however I think I put a few of them too close to my scalp.

 Clips:

The clips are the best ones I have used, they don't tug the hair, although a few did but as I said above I put them in slightly too close to my scalp. They have a silicone bit to the clip so it doesn't hurt your own hair. The clips looks like they have been sewn on really well and you get two spare clips just in case anything happens.

Quality:

These are the best extensions I have ever brought. Years ago when I used to wear extensions every day I used to buy from eBay, local extension shops in the city centre or down the road from my house. They were never as soft, which I know will go away after I wash, curl them etc. Normally there is the odd black/brown pieces of hair in the wefts however with these I haven't found any this dark. The hair is multi-tonal anyway so there are slightly darker blondes in the wefts but nothing as dark as a black/brown. The other extensions were so thin towards the ends I always had to buy about 3 packets just to try to make them thicker but I won't have to do this with these as they do slightly thin out but nothing like my old ones.

Which clips go where?:

The way that I put in the clips is:

2 clip weft x1 at the bottom one
layer of own hair
2 clip weft x1
layer of own hair
3 clip weft x2 starting from near the ear on each side and overlapping at the back
layer of own hair
4 clip weft x1
layer of own hair
4 clip weft x1
all hair down
1 clip weft x2 one by each ear to 'frame' the face almost
1 clip weft x2 where I felt like it needed it

(I hope this makes sense!)


How will I style them?:

Although in the photo I have straightened my hair and the extensions slightly I never really wear my hair straight I always tend to have it wavy as my hair is naturally slightly wavy so it means I only have to curl a few pieces of my hair to make it look better. So I will be curling my extensions which will also help them blend with my hair better.


Are the extensions value for money?

I think that this is the most I have ever paid for extensions however I do think that they are worth it. However this is just my first impression, I haven't used them out of the house, washed them etc. From other reviews I have read/watched the extensions can last from 3 months to a year. I am hoping that they last about a year as by then my hair would hopefully have grown some more and will be closer to my desired hair length.

I shall do an update on how the extensions have lasted in a couple of months once I have worn them for a while. I won't be wearing them everyday just on a night out or when I feel like wearing them.


I think that's everything?!


Website: http://www.foxylockshair.co.uk

Extensions I brought: http://www.foxylockshair.co.uk/light%2Dash%2Dblonde%2D%2360%2D%2D%2Ddeluxe%2D20%22%2Dclip%2Din%2Dhair%2Dextensions%2D165g%7E447

Youtube Foxy Locks/ Imogen: http://www.youtube.com/user/foxylocksextensions

I recently got brought Sensationail as a Christmas present off my parents, my mom allowed me to test it out a week or so before Christmas to make sure that it works. So far I have used it three times using a different colour each time.


'The SensatioNail™ Starter Kit contains all you need for 10 perfect Gel Polish applications including 

the exclusive Pro 3060 LED Lamp to cure to a glossy, damage proof finish in seconds. Depending on 

amount used'


I got the red starter kit which comes with:


Led lamp & cable
red gel colour (scarlett red)
clear gel colour
primer
cleanser 
lint free pads
nail file 
cuticle stick
instructions 

The kit was brought from Boots for £80ish I think it was, my parents also brought me the remover liquid (£6) and the metal tool that helps remove the gel (£5).

It says that the kit allows you to have gel nail polish on for 2 weeks, after 2 weeks you could take it all off or just fill in the growth gap. 

For the first application I used the scarlett red with fake nail tips as my nails were quite short. I found the application to be very quick and easy to use, the only thing that took ages to do was cutting down and applying the nail tips. 

You get a step by step instruction leaflet that comes with the kit, but here is a quick step by step on what you have to do:

- first to file and cleanse the nails with the cleanser and lint free pad
- then add primer around the edges of the nail in a circle shape
- add a base coat with the clear gel, cap off the nail and cure for 30 seconds (the machine will beep at 30 seconds and turn off after 1 minute)
- add the first coat of the colour, cap off the nail and cure for 60 seconds
- add second coat of the colour, cap off the nail and cure for 60 seconds
- add top clear coat, cap off the nail and cure for 30 seconds
- wipe away the moisture using a lint free pad and the gel cleanser

As the lamp is small I can only fit in 4 fingers at once, I found it best to do the one hand first then the other as you are not meant to touch the nails until you have finished as there is a moisture layer which you need to wipe away at the end. 

Here is a photo of my first attempt, scarlett red with nail tips:


Second attempt using Midnight Rendevous (black):


Taking off the gel polish, I didn't buy the kit you can get which has foils I just made my own. I put some of the remover onto a cotton wool ball put this onto my nail then wrapped my nail/finger in foil, I left this on for a while then removed all of this. The polish was loose I just had to use the remover metal tool to help get off any stubborn bits:


Third attempt using Miss Behave (dark red)


For me the gel polish lasts just over a week, the first time one of the fake tips came off so I just took all of it off after about 1 week. The second time it was chipping slightly on about the 9th day, but this happened while I was at work. As I work at H&M I am constantly using my hands to put clothes back onto the hangers etc so they get knocked about a lot. The third time I have only just put on yesterday, it did chip today I accidentally bent my nail back while opening the fridge and so I just had to redo one nail. Apart from this it works really well, it stays on for ages, keeps its shine and my nails don't seem to be breaking as much! 

I am also using OPI's original nail envy as I was told by my cambridge diet consultant who is also a nail technician that this is good to help stop nails from breaking. My nails were very strong which meant that they were heavy so when they got to a certain length they would easily break because of the weight of them. I put the nail envy on before I do my nails, I put on two coats of this. You are meant to put this on every single day but as I have polish on I just do it before I redo my nails. Sometimes I have left my nails for a day or 2 and applied it every day. 

I have noticed that my nails seem more flexible which it is meant to do, normally if I had knocked them like I did earlier my nail would have broken, instead it was just the polish. They are currently at the length they would normally get to before they break off. A couple have broken in the past few weeks but they are more flexible than they were then so I am hoping they don't break again! I have heard of the tea bag trick when a nail starts to break, you put a tiny piece of tea bag over the clip so it seals it and holds it together, so I will try this when it happens. 


So after many days of looking at reviews of different types of hair extensions I decided to go for Foxy Locks. They are a bit more expensive than what I was hoping to spend, however I noticed yesterday that there was a 10% off code on the website, therefore I would be saving a bit of money.

The extensions I went for was the 165g deluxe 20 inch in ash blonde no.60. As my hair is ombre but the ends are light ash I decided to go for this colour, I will then dye the top part of the hair so it blends in with my medium blonde hair. Hopefully the light ash colour will match my light blonde ends!

I originally did want to buy about 200g or above I was looking at other websites that offer this to you, however you are only getting an extra weft of hair normally a quad weft 'volume weft' which does have 50g-60g extra of hair in it which is quite good. For now I am just going to stick with the deluxe set as I am hoping it will be enough.

As it was 10% off I decided to buy a case for the hair extensions as well, as it was currently 20% off anyway £20 reduced to £12.99 plus with 10% extra off the total price. Plus P&P the total of the hair extensions and the case came to just over £80, I got just over £8 off the whole price not including the P&P.

I ordered the extensions this morning and they have already been shipped out! I just got an email about 4pm to say that the extensions have been shipped, it has been about 6 hours-ish since I ordered them so I am so pleased with how fast they have been shipped! As I do live in the UK they shouldn't take too long to get here, I chose the cheaper delivery which isn't next day so I think that they will turn up Monday.


'BABY SKIN PORE ERASER

  • Bye bye pores!
  • Baby poreless skin comes in one second.'
  • Quote from maybelline website. 

Yesterday I brought the Maybelline baby skin pore eraser primer from Boots at £7.99, I had wanted to try it since I saw it advertised as I have a bit of trouble with my pores on my nose. Everywhere else seems to be easily covered by my foundation however my nose is a problem area. I have tried other primers to see if they can cover my pores but I haven't be able to find one that actually works. 

I tried the primer this morning, it comes in a light blue squeezeable bottle with a nib and the end where the product comes out, the primer is 'clear' and goes onto the skin clear.

I only put a tiny amount onto my nose as I don't need it anywhere else. I was really surprised as it seemed to work straight away my pores seem to blur away. I then put on my normal Revlon foundation with my real techniques brush and my pores seemed to disappear! I couldn't believe it! Goodbye pores!!! I plan to leave it on for the rest of the day and see if it is still the same at the end of the night. 


Lighting was weird for the first photo, without makeup on, pores are visible


Primer with foundation on top, normally pores are still visible. 


The only thing that I don't really like about the product is the packaging graphics, I do think it looks quite tacky aimed at teenagers rather than adults. Which if that is the market they were aiming for then I would say it does work but for me it just doesn't seem very grown up. It is the same type of packaging graphics for the Baby Lips lips balm which I have in pink punch. I think the graphics are very 'youthful' and not aimed at older women from 18 onwards. I prefer simple graphics on the products I buy, not too in your face and bold like the ones maybelline have on the Baby Lips and Skin items. 


End of the day: 


It is about 10pm and I have worn the makeup for about 12 hours. The pores are still blurred but my nose is slightly shiny. I forgot to take photos of this as I have just took my makeup off. Overall I am very impressed with the product as it seems to do exactly what it says on the bottle!